HML export
HML, or Histoimmunogenetics Markup Language, is an XML data format designed for exchange of HLA gene related information. This format addresses NGS data exchange by refining the HML to conform to the proposed Minimum Information for Reporting Immunogenomic NGS Genotyping (MIRING) reporting guidelines (miring.immunogenomics.org). More background information can be found here.
The HML export of NGSengine contains all relevant information generated by NGSengine in compliance to the HML standards. At present, exports can be generated for HLA- and HLA related genes, whereas exports for KIR genes are not yet available. Prerequisites for HML exporting are:
- Exports can be generated for analyzed loci only
- Loci with insufficient result will not be exported
- Rejected loci will not be exported
Preparations to enable HML export
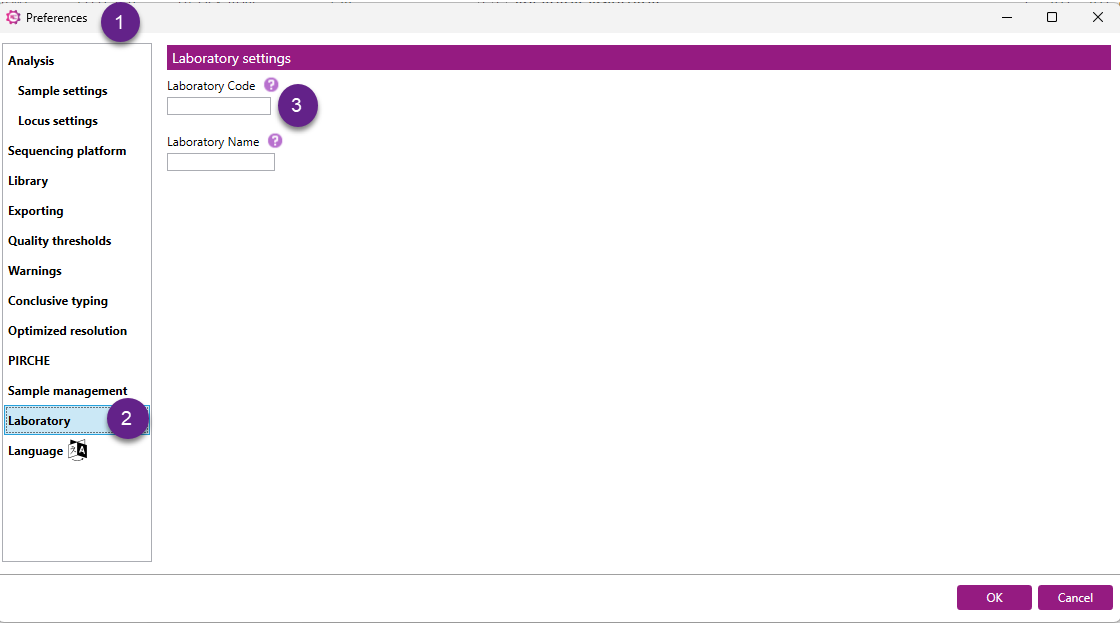
Set the ‘Laboratory Code’
Go to ‘File’ > ‘Preferences’ > ‘Laboratory’ and fill in the ‘Laboratory Code’:
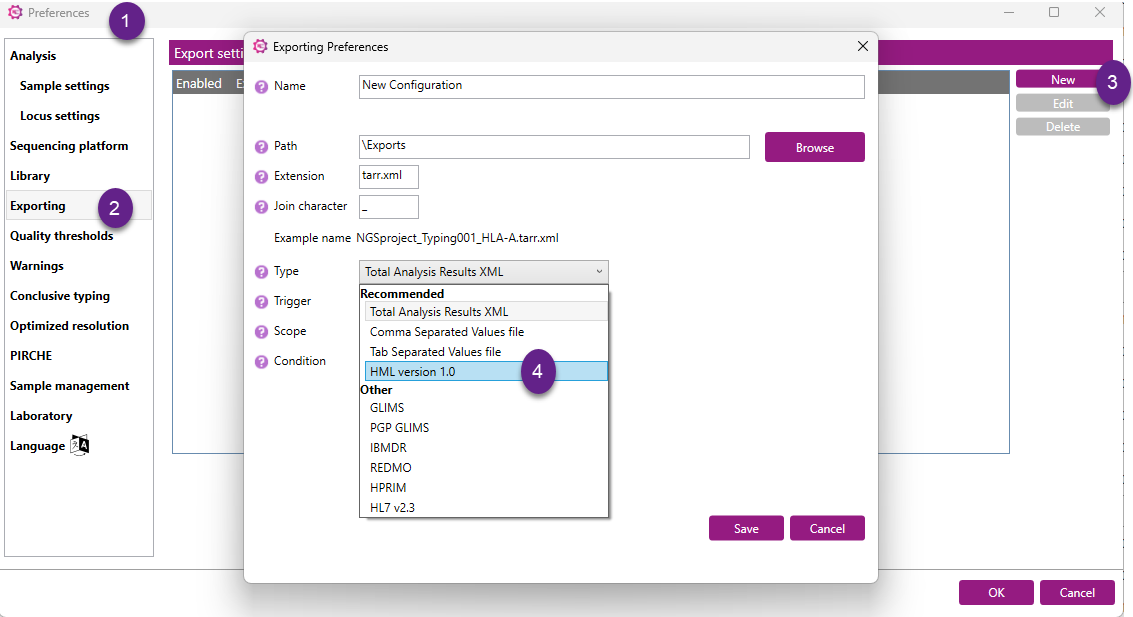
One-time setup of the HML export settings
To enable creating HML exports, a one-time setup of the export preferences is necessary.
Go to 'File' > 'Preferences' > 'Exporting' > 'New' and choose 'HML version 1.0' for exporting:
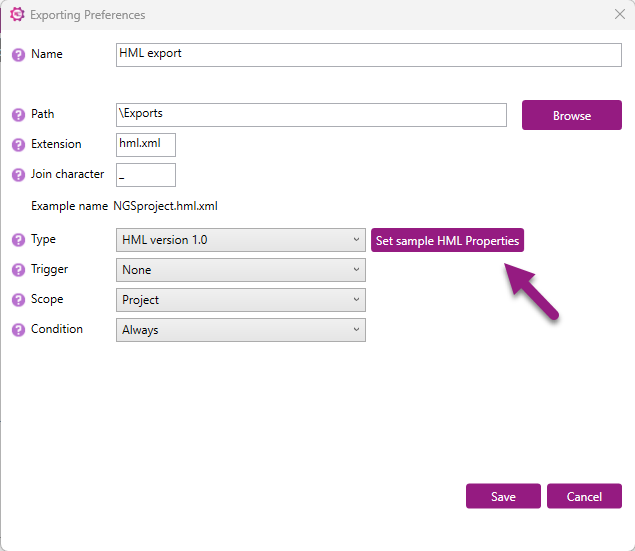
Set sample HML Properties
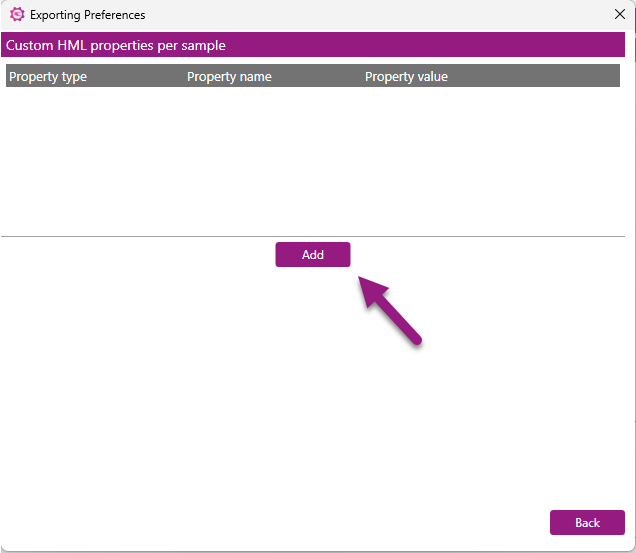
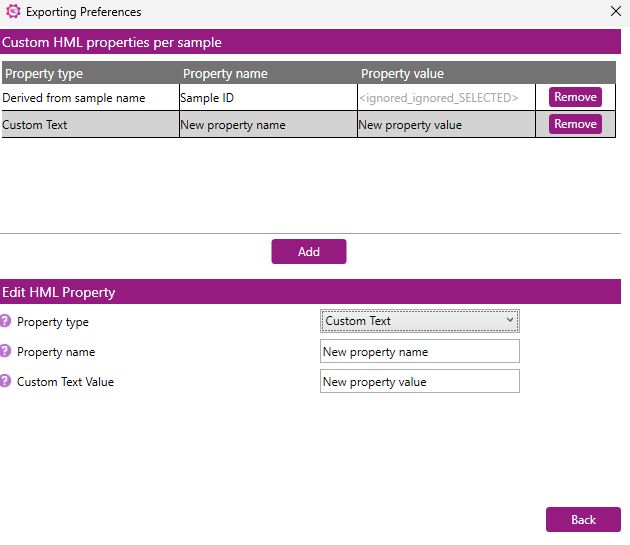
It is possible to set custom HML properties per sample by clicking on the “Set sample HML Properties” tab.
After which, you will be redirected to the Custom HML Properties per Sample window. In this window, you can click the 'Add' button to include a customized element of interest in the HML file.
After clicking "Add" you can select the below information in relation to the property to be added:
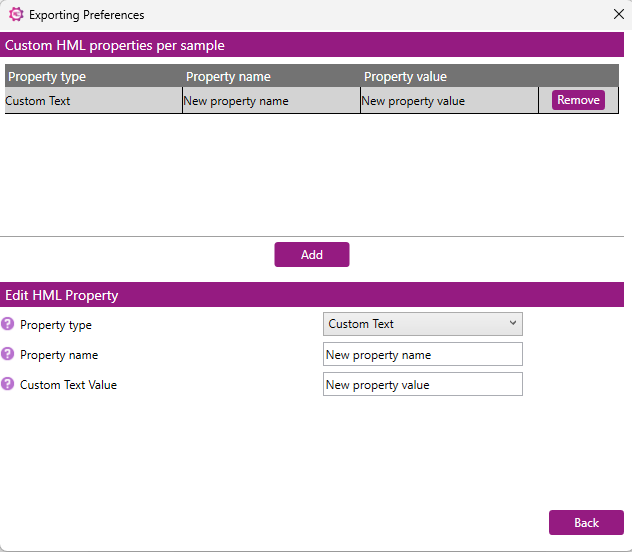
Property type: this field defines what kind of custom HML property you are setting for each sample. There are two possible options:
- Custom Text – Use this option to apply the same predefined text value to all samples. This is ideal for assigning a consistent label or identifier.
- Derived from Sample Name – Select this option to generate the property value dynamically based on the name of each sample. This is useful when sample names contain relevant information (e.g., IDs or categories) that should be reflected in the HML file.
Adding a "Custom Text" property:
Use 'Custom Text' for the same custom text to be added to each sample.
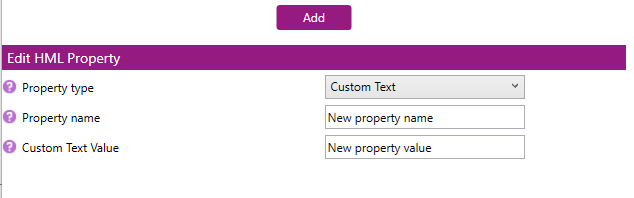
After selecting Custom Text as the property type, you can assign the following:
- Property Name:
The name of the HML property to be assigned to each sample. - Custom Text Value:
The custom text to be used as the value for the HML property for each sample. This value will be the same for every sample.
Example:
- Property Name: Laboratory code
- Custom Text Value: LAB-2025-001
Adding a "Derived from Sample Name" property :
Use 'Derived from sample name' to include (part of) the sample name for each sample.
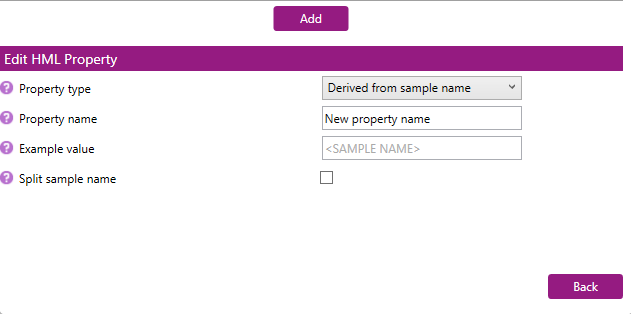
After selecting "Derived from sample name" as the property type, you can assign the following:
- Property name: A user-defined name for the new property you are creating. For example, if your sample name is Run23-BatchA-Sample01 and you want to capture the sample identifier, you could name the property "Sample ID".
- Example value: This field provides a preview of how the HML property value will be derived from the sample name. It is grayed out and not editable because it is automatically updated based on your configuration.
- Split sample name: When this box is checked, the software will split the sample name using the delimiter you specify. For example, with the sample name Run23-BatchA-Sample01, enabling splitting allows you to isolate specific segments of the name.
When "Split sample name" is selected, it is possible to specify both a delimiter and a field index to define which part of the sample name should be used as the property value.

- Delimiter: In this field you may define, the character that separates different parts of the sample name. For example, if your sample name is Run23-BatchA-Sample01 and the delimiter is a hyphen (-), it will be split into:
- Run23
- BatchA
- Sample01
- Field Index: The field index is a number that tells the system which part of the split sample name to use as the property value.
- Field index = 0 → selects the first part (Run23)
- Field index = 1 → selects the second part (BatchA)
- Field index = 2 → selects the third part (Sample01)
A preview of what part of the sample name will be used base on the delimiter and field index selected can be seen in the example value field.
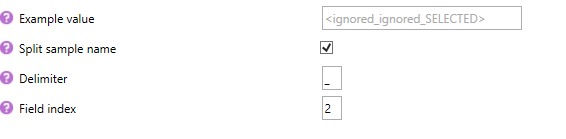
For example, when the delimiter _ (underscore) is used and the field index is set to 2, the word "SELECTED" in the example value provides a visual indication of the part of the sample name that will be included in the HML file for this property.
Custom properties can be easily managed within the interface.
- To add a new property, click the “Add” button.
- To remove a property that you no longer need, simply click the “Remove” button next to that property.
Generating an HML export file
Once the export is made available, the actual export can be generated.
The file name of the export will be ‘projectName.hml.xml’ and can be found in the Export folder in the Project folder.
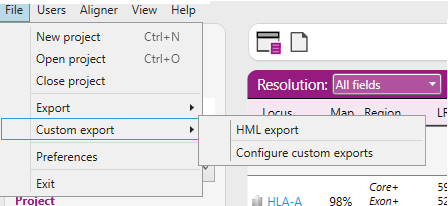
'File' > 'Custom export' > 'HML export'