Experimental Setup
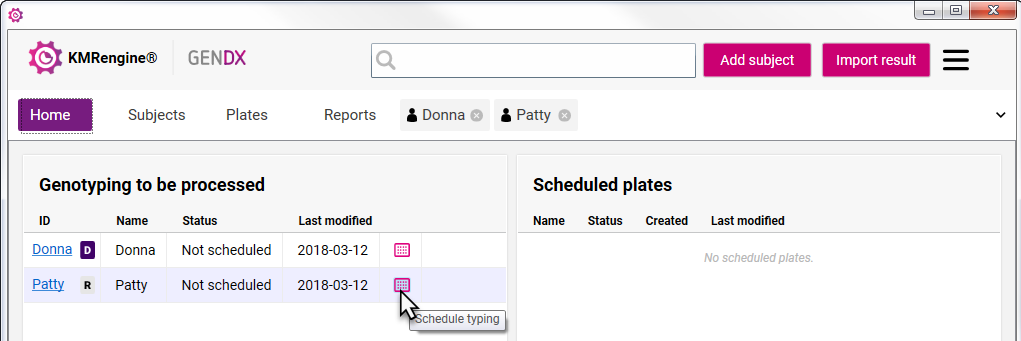
- In the "Home" tab, click the plate icon hyperlink behind the recipient to schedule a typing.
Alternatively, this can be done via the "Subjects" tab.
- Under "Samples to type" select the correct recipient(s). If neccesary adjust the input concentration (ng/ul) and amount (ng/well).
- In the "Typing kit" section, select the kits that are being used.
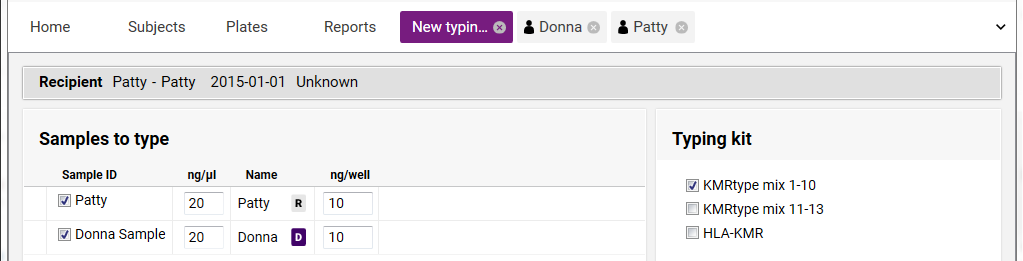
- Click "New Plate".
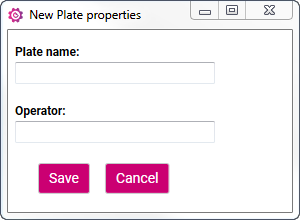
- Enter a Plate name and Operator. Click "Save".
- Click "Save" at the bottom of the screen.
- The experimental plate setup is shown.
- "Plate name" and "Operator" can be changed if needed by right-click on it, and then selecting "Change plate properties":

A window will open where you can type in a new plate name and/or Operator, next click on "Save".
- More samples can be added to the plate if needed.
- Plate setup can be viewed in "Sample view" or "Assay view". See examples below:
Sample view for 2 samples:
Assay view for 2 samples: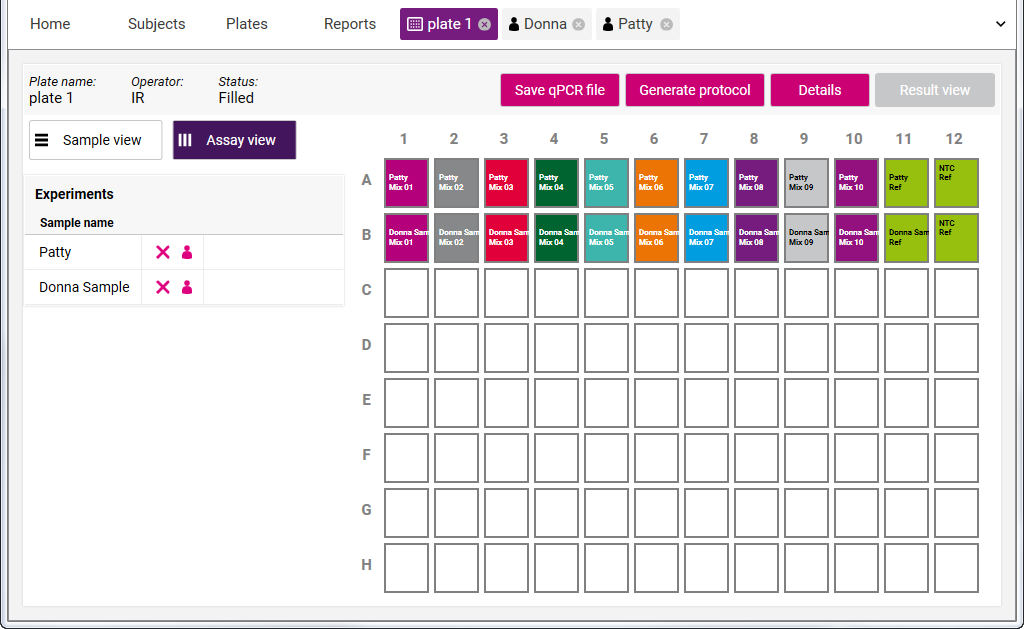
- Optionally, samples can be manually moved on the plate to create a customized plate layout. An entire row can be moved by clicking and dragging. A single well can be moved by holding Ctrl + clicking and dragging.
- Click "Save qPCR file".
- Browse to the desired location and save the file. This file has to be imported into the template of the qPCR machine before starting the run.
- Click "Generate protocol" to create the KMRtype laboratory protocol.