Experimental Setup
- To perform a monitoring experiment with KMRengine, find your recipient in either the "Subjects" tab or the "Finished past month" section of the "Home" tab, and click on the plate icon hyperlink.
- Click "Add sample".
- Fill in the details of the sample that will be used for monitoring, make sure sample type used is set to "Post".
- Click "Save".
- In the home tab, find the newly entered sample (under Monitoring samples to be processed) and click on the plate icon hyperlink (or go to the Subjects tab, find the recipient and click on the hyperlink).
- In the "Pre sample" section select the reference sample(s) to be used for monitoring. This is typically a sample of the recipient's DNA before transplantation.
Alternatively, a cell line can be selected as pre-sample reference: click on "Select cell line", select the correct cell line and it will be added in the Pre-sample list.
- In the "Post sample" section select the post-sample(s) to be used for monitoring,
- If necessary adjust the concentration (ng/ul) and amount (ng/well).
- In the "Informative markers" section, the informative markers for any of the samples in the genotyped group are displayed and are available for selection. (For samples that were genotyped without KMRengine, please see section Monitoring without genotyping)
- Select the markers to be used for the experiment.
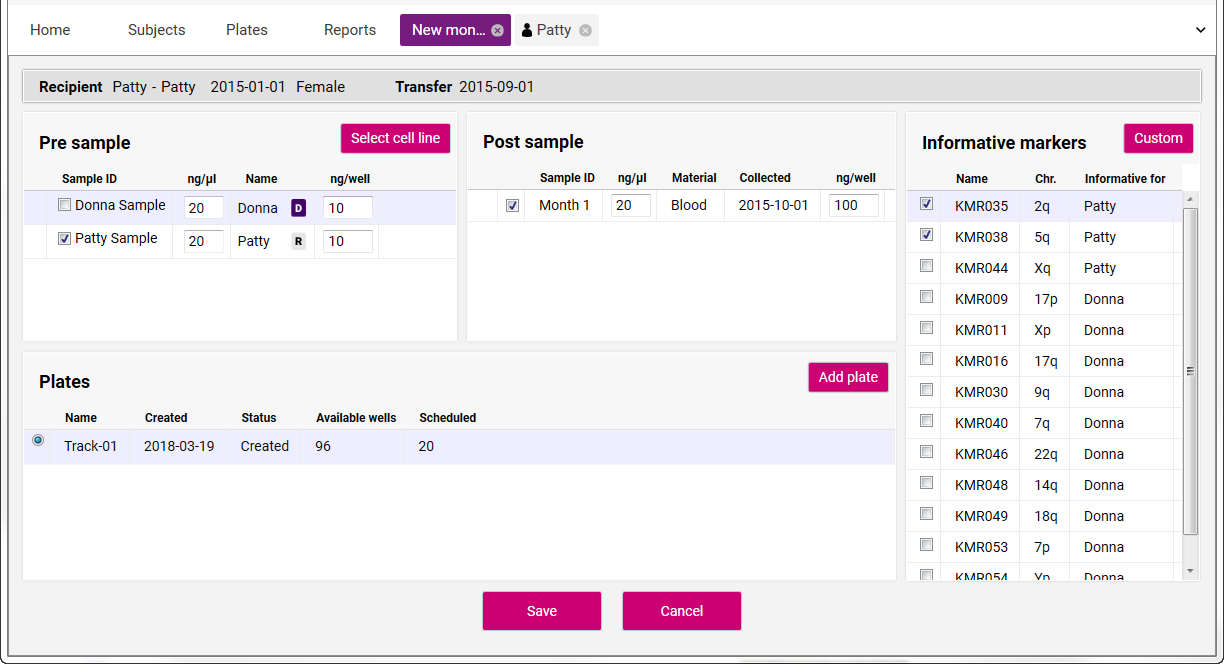
- Click "New plate" or "Add plate".
- Enter a plate name and operator. Click "Save".
- Click "Save" at the bottom of the screen.
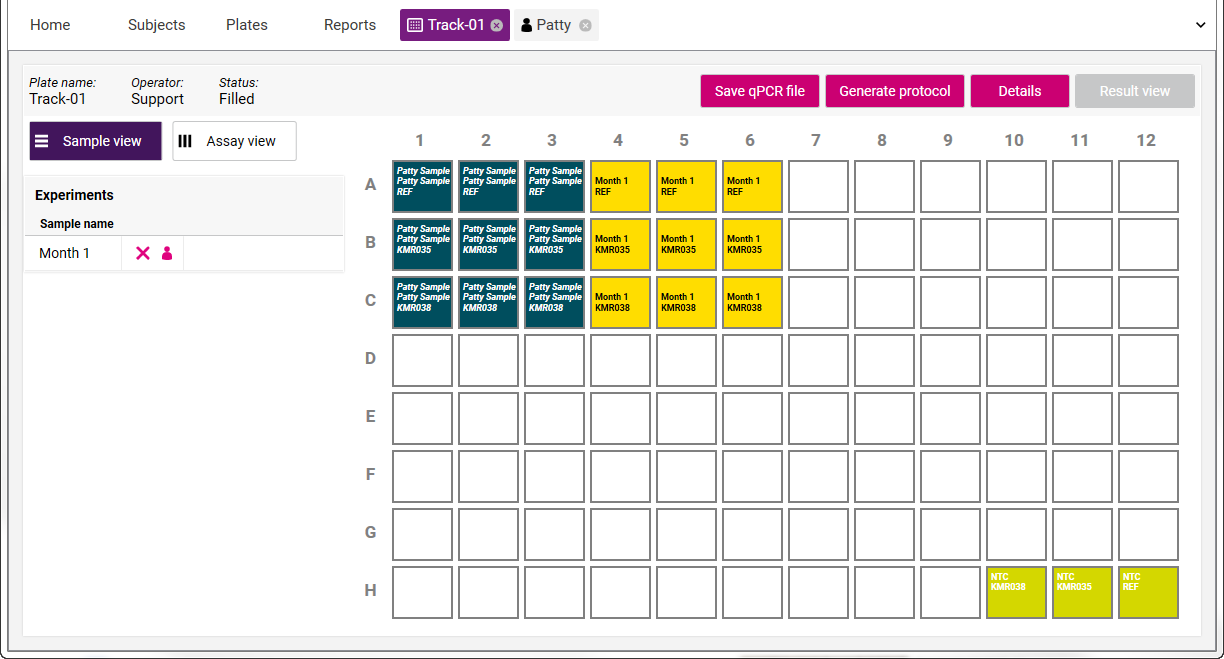
- A new tab is opened for the plate that was just created.
- "Plate name" and "Operator" can be changed if needed by right-click on it, and then selecting "Change plate properties":

A window will open where you can type in a new plate name and/or Operator, next click on "Save".
- Reactions for a particular recipient sample are grouped together. In the example below, all reactions are performed in triplicate with two informative markers.
- View can be toggled between "Sample View" and "Assay View" by clicking the appropriate buttons on the left.
- "Sample view" layout shows the placement of pre-transplant and post-transplant samples.
- "Assay View" layout shows the placement of the markers.
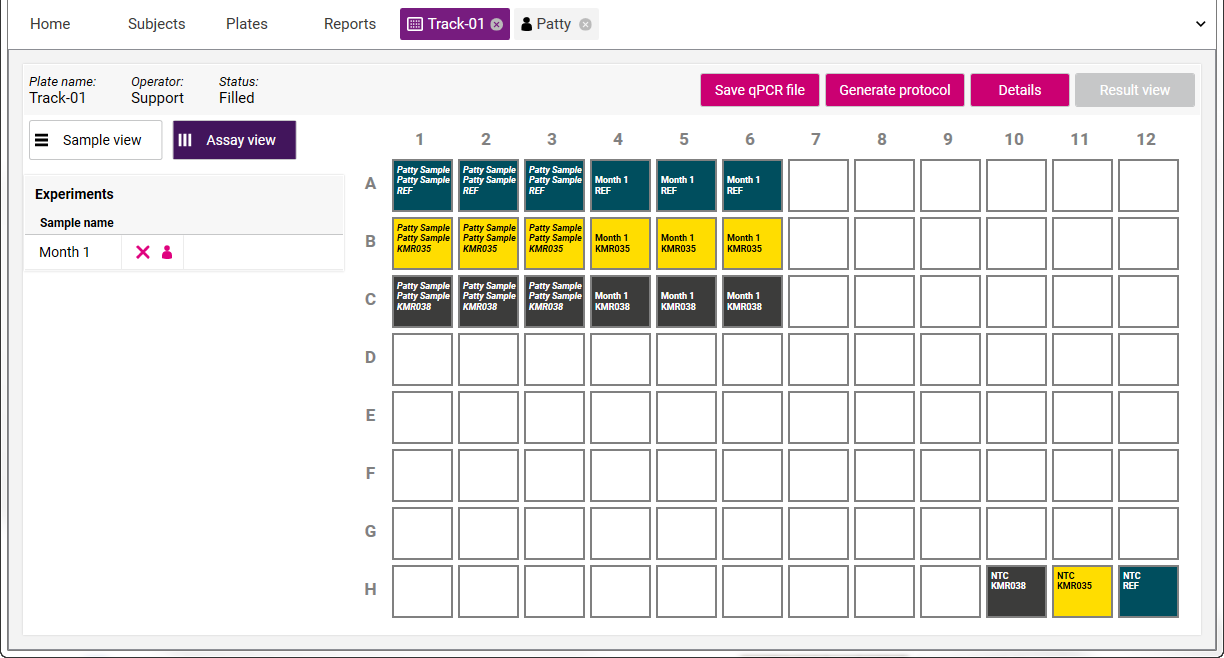
- The reactions in Row H constitute No-Template Controls (NTCs) and have molecular biology grade water added instead of the sample.
- More samples can be added to the plate if needed.
- Click "Save qPCR file".
- Browse to the desired location and save the file. The file can then be imported into the qPCR machine to perform the qPCR analysis.
- Click "Generate protocol" to create the KMRtrack laboratory protocol.